Showing posts with label Tutorial. Show all posts
Friday, November 22, 2013
Saturday, August 17, 2013
Japanese Sweets Makeup Tutorial
Do you love sweets? How about incorporating them in your makeup?
Here are 3 sweet makeup tutorials from Kera Magazine's August 2013 Edition.
|
| Photo from: chewoutloud.com |
Chocolate mint ice cream inspired makeup? Who would say no to this?
![]() |
| Photo from: global.rakuten.com |
A slice of melon cake? Anyone?
![]() |
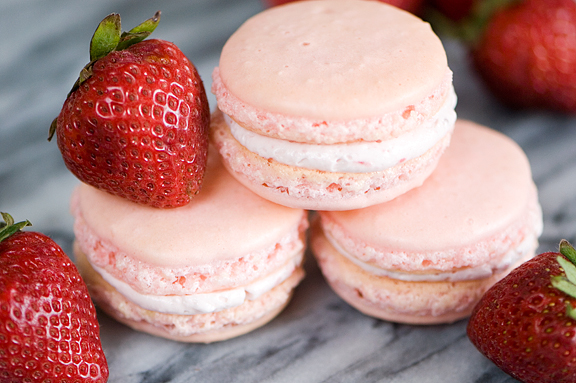
| Photo from: userealbutter.com |
Do you love french macarons? Try this strawberry macaron inspired makeup!
These make up tutorials would definitely fit sweet lolita fashion. Surprisingly, they are so simple and very doable it can be made into an everyday makeup too.
Wednesday, July 10, 2013
Kawaii on a Budget
I’m a very frugal person and I want to share where I buy and how I manage my kawaii, decora and ulzzang fashion enthusiasm without breaking the bank.
1. DIY
Are there times when you really want to have something and it’s either not available or too pricy? What is better than to make your own? You can even revamp your old clothes. Just let the creativity flow and have fun!
2. Kids’ Department
If you don’t know it yet, the kids’ department has a lot of cute items! Well of course, they are for kids after all. You can buy clothes a fraction of the price for adult ones. I wear kids’ clothes and accessories because why not? Some were mine when I was younger (and still fit) while some others I have bought brand new.
3. Thrift Shops
These places store marvelous items which are mostly hidden to the eyes. Some of you may be cringing like now. I admit that at first I was really skeptical in buying resale goods but after a few visits in a local shop, my eyes were opened into the kind of gems they have, for a very cheap price as well! You just have to be patient in looking for good stuffs in a mass of considerable junk. You can also opt to go to thrift stores with sifted items to save time and effort. Prices may be a bit higher but still good. Just remember to clean and disinfect the items you buy before using them.
4. Street Markets
They are places for wonderful bargains! You can haggle and buy items half their price or even buy two items for the price of one. What is not to like about them?
5. Online Shopping
Most of the times items online come a bit pricy because of shipping taxes you have to pay but some of them can really be cheap not to mention, unique! You just have to be very vigilant in online shopping as it posts hazards of theft and scam.
6. Sale Promotion
This is the best time to get your favorite brands a tad cheaper. You just have to endure rubbing shoulders against strangers and long queues.
Thank you for reading. Stay Kawaii! ♥
Sunday, June 23, 2013
How to Cut or Trim Your Bangs
![]() |
| Photo credits: hairstylesweekly.com |
Having bangs is really kawaii but in the long run it can become quite troublesome. You'll have to go to the salon every few months just to have it trimmed. I think it's such a waste of time, not to mention, money. Why have it cut with a fee when you can cut it yourself for free! Plus, it's super easy to do. All you'll need a pair of scissors. No special hair cutting skills and experience is needed. You can also do this technique if you don't have a bangs yet and want to have one.
Steps:
1. Determine your desired bangs length.
I always cut mine below where my eyebrows are. For those who will have bangs
for the first time, try visualizing yourself with bangs because once you cut your hair
there's no turning back!
2. Comb your hair to the front of your face and gather your bangs or a portion of your hair.
Tip: Grab hair in an imaginary triangular area above your forehead.
![]() |
| Photo credits: womens9.com |
3. Pull and twist the hair once
Twisting the hair will make your bangs arch towards your temples.
Tip: Make sure that the hair you're working on is in the center of your face.
Make your nose as the reference.
![]() |
| Photo credits: ©Rino Jasper, beautyideas.com |
3. Cut
Tip: Snip it straight and a bit longer than your desired length
For those who are new to bangs, try not cutting it short at once.
You can repeat the steps a few times until you get to your desired length.
4. Pull hair upwards and cut your with your scissors at an angle.
This will make your bangs not look like a block of trimmed hair over your forehead and
give the hair nice feathered ends.
![]() |
| Photo credits: womens9.com |
Thank you for reading and I hope that this tutorial was helpful.
Stay kawaii! ♥
Wednesday, June 19, 2013
How to Temporarily Color Your Hair
![]() |
| Photo credits: tokyofashion.com |
Show of your creativity and pump up your kawaii look by coloring your hair in outrageously kawaii colors!
![]() |
| Me with purple hair |
Unfortunately not everyone can get this done because of school policies or the fear of permanently damaging the hair. But in every problem, there is always a solution. And in this problem, the solution is:
HAIR PASTELS
also known as hair chalk.
I've found this item on ebay. They can come in a set of 12, 24, 32 and 48 colors. WOW! That's a lot of colors right? The possibilities are endless!
I got the 24 color set and as you can see, that's a lot of color choice!
I would like to make a separate post on a tutorial and a review about this product so that's all for now. Thank you for reading.
Stay Kawaii! ♥
Saturday, June 15, 2013
DIY Nekomimi (Cat Ears) Headband
One of my headbands started falling apart. Boo! 。:゚(。ノω\。)゚・。
But I thought that it would be such a waste to throw it away so I completely dismantled it and decided to give it a new life by making it into... -drum roll-
Yes, yes! A nekomimi headband! 猫 (neko) meaning cat in Japanese and 耳 (mimi): ears. The end product is very cute and it's amazingly easy to make! (=^-ω-^=)
Here's what you'll need:
1. Old headband or a plain new one
2. 12 gauge round sterling silver wire or craft wire
3. Needle-nose pliers
4. Super glue
5. 22 gauge round sterling silver wire or craft wire
6. Your choice of decoration (beads, ribbon)
1. Old headband or a plain new one
2. 12 gauge round sterling silver wire or craft wire
3. Needle-nose pliers
4. Super glue
5. 22 gauge round sterling silver wire or craft wire
6. Your choice of decoration (beads, ribbon)
Steps:
1. Cut 2 pieces of 12 gauge wire for the ear frames. You’ll need about 5 inches each piece.
2. Bend both wires to look like an inverted V and lay it out along the headband.
Tip: Mark the position where you want the ears to be.
3. Cut excess wire and loop the ends of both wires.
4. Secure the ear frames in position using the 22 gauge wire.
Tip: Use the needle-nose pliers to coil it inside the loops. Make sure that you coil tightly or else the ears will just be sliding along the headband.
5. Decorate. You can use pearl beads, crafting gems, ribbons, anything you want. In my case, I wrapped the headband with ribbon.
6. Secure decorative articles with super glue.
1. Cut 2 pieces of 12 gauge wire for the ear frames. You’ll need about 5 inches each piece.
2. Bend both wires to look like an inverted V and lay it out along the headband.
Tip: Mark the position where you want the ears to be.
3. Cut excess wire and loop the ends of both wires.
4. Secure the ear frames in position using the 22 gauge wire.
Tip: Use the needle-nose pliers to coil it inside the loops. Make sure that you coil tightly or else the ears will just be sliding along the headband.
5. Decorate. You can use pearl beads, crafting gems, ribbons, anything you want. In my case, I wrapped the headband with ribbon.
6. Secure decorative articles with super glue.
Thursday, June 13, 2013
Ulzzang Inspired Gradient Lips Tutorial
I have been using gradient lip makeup technique for quite a while now. This style became very popular among ulzzangs last season but I’m still not over this style! I love how it makes the lips look soft, glowing and doll-like.
What you’ll need:
1. Lip balm or lip primer
2. Lip concealer or nude colored lipstick
3. Cherry red lip tint
4. Light pink lipstick (optional)
5. Clear or peach colored lip gloss
Here are the 6 simple steps that I do to achieve the look:
1. Apply a light layer of lip balm on lips.
2. Make your lips pale using a lip concealer or a nude colored lipstick. In my case, I use a concealer.
3. Apply cherry red lip tint on the inner center of the lips.
4. Spread evenly using a lip brush or your finger.
***
Apply light pink colored lipstick over the tinted area. This step is
optional but I find this very helpful for the next step. It also creates
better gradation.
5. Blend the color from the inner to
the outer lips using an upward motion for the upper lip and downward
motion for the lower lip.
6. Apply clear or peach colored lip gloss to finish.
Thank you for reading! And I hope you find this tutorial helpful.
Subscribe to:
Posts (Atom)