Showing posts with label Makeup. Show all posts
Showing posts with label Makeup. Show all posts
Friday, November 22, 2013
Saturday, August 17, 2013
Japanese Sweets Makeup Tutorial
Do you love sweets? How about incorporating them in your makeup?
Here are 3 sweet makeup tutorials from Kera Magazine's August 2013 Edition.
 |
| Photo from: chewoutloud.com |
Chocolate mint ice cream inspired makeup? Who would say no to this?
 |
| Photo from: global.rakuten.com |
A slice of melon cake? Anyone?
 |
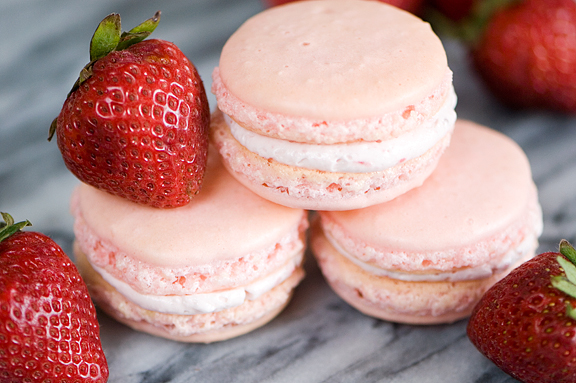
| Photo from: userealbutter.com |
Do you love french macarons? Try this strawberry macaron inspired makeup!
These make up tutorials would definitely fit sweet lolita fashion. Surprisingly, they are so simple and very doable it can be made into an everyday makeup too.
Saturday, June 22, 2013
Product Review: Hanskin Glossy Magic BB Cream
BB cream or blemish balm cream is a hailed beauty product. It was formulated by a German dermatologist, Dr. Christine Schrammek and became extremely famous in Japan and Korea. It has become my favorite cosmetic product because it is an all-in-one make-up package. In this post I will be reviewing a BB cream by a famous Korean brand, Hanskin.
My view of this product is based on my skin type which is both sensitive and oily with a few blemishes.
My view of this product is based on my skin type which is both sensitive and oily with a few blemishes.
Available in 35mL (upper picture) and 43.5mL (lower picture)
It's just weird that the front print of 35mL bottle says whitening and wrinkle
while the 43.5 only says whitening.
I have made a little research on the benefits of the major ingredients in Hanskin's Glossy Magic BB Cream. First off, chamomile. Studies have shown that chamomile has anti-inflammatory, anti-bacterial, anti-allergenic and sedative properties. This can really help in reducing the redness of pimples as well as prevent new breakouts caused by bacteria. Aloe Vera is used in cases of burns and eczema because of its moisturizing properties. Good for keeping the skin hydrated! Purslane can nourish skin because it is rich in minerals, vitamin C and omega-3 fatty acids and soybean extract have anti oxidant as well as skin lightening properties.
This BB cream claims to whiten skin and prevent wrinkles. My little research on the components of the cream makes me believe it so. That’s some
good start off points.
What I bought is a 35mL bottle. The packaging is
simple; white plastic tube and pastel pink-colored cover.
The cream is bit
runny but this is not a downside. It
actually makes the cream easier to apply and blend. It has a light
scent which is what I like about it. I don't like heavily scented cosmetics. The cream evens out the skin tone and finishes off with a glowing shimmer. I love how dewy and shimmery the face looks after applying the cream. Though this does not a good thing for my skin type, I still think that this is a positive point. I find that it also makes
the skin feeling smooth after application. My skin is really sensitive and is prone to breakouts but this product did not cause me any pimples.
On the other hand, this BB cream does not have SPF which is rather important in preventing premature skin aging due to UV rays. It also has a light coverage which made me need another layer of concealer to hide my imperfections. It is only available in one shade so it won’t be suitable for other skin tones. I guess I’m lucky enough that the color shade of the cream matches my face. The dewy and shimmering finish does not really compliment a hot or humid weather. If you have the same skin type as mine, the dewy finish is a no no but you can always apply a light dab of powder.That's what I do anyway.
Here’s a run-down of the things that I like and I don’t like about this product.
Positive:
♥ Skin whitening
♥ Anti-wrinkle
♥ Easy to blend
♥ Light scent
♥ Light scent
♥ Makes skin dewy and looking hydrated
♥ Frost finish
♥ Did not cause me pimples
♥ Did not cause me pimples
Negative:
■ No SPF
■ Light coverage
■ Only 1 shade available - not suitable for all skin tones
■ Does not compliment oily skin
■ Not suitable for hot and humid weathers
■ Not suitable for hot and humid weathers
I highly recommend this product preferably to those with normal to dry skin. I find the hydration superb and the dewy look would definitely suit these skin types. I would still recommend this product to those with a combination skin type like mine (oily and sensitive). It did not cause me any breakouts and I just finish my face off with powder to tone down the dewiness. Though it has some negative points, I think that the positive still outweighs it.
Disclaimer: Please do not solely rely on the information I gave. This review is purely my thoughts and experience in using the product. You should always check the product yourself and consult with your dermatologist.
Thursday, June 13, 2013
Ulzzang Inspired Gradient Lips Tutorial
I have been using gradient lip makeup technique for quite a while now. This style became very popular among ulzzangs last season but I’m still not over this style! I love how it makes the lips look soft, glowing and doll-like.
What you’ll need:
1. Lip balm or lip primer
2. Lip concealer or nude colored lipstick
3. Cherry red lip tint
4. Light pink lipstick (optional)
5. Clear or peach colored lip gloss
Here are the 6 simple steps that I do to achieve the look:
1. Apply a light layer of lip balm on lips.
2. Make your lips pale using a lip concealer or a nude colored lipstick. In my case, I use a concealer.
3. Apply cherry red lip tint on the inner center of the lips.
4. Spread evenly using a lip brush or your finger.
***
Apply light pink colored lipstick over the tinted area. This step is
optional but I find this very helpful for the next step. It also creates
better gradation.
5. Blend the color from the inner to
the outer lips using an upward motion for the upper lip and downward
motion for the lower lip.
6. Apply clear or peach colored lip gloss to finish.
Thank you for reading! And I hope you find this tutorial helpful.
Subscribe to:
Posts (Atom)


